Part One: The Rotational Molding Industry
The Rotational Molding Process
Part One: The Rotational Molding Industry
The Rotational Molding ProcessPart One: The Rotational Molding Industry
The Rotational Molding Process
In rotational molding, a pre-measured weight of plastic, usually in powder form, is placed in the cavity of the mold, which is then closed shut. The weight of material needed is determined by the wall thickness required. In the case of some specialty plastics (eg polyvinyl chloride and polyurethane), the material is delivered to the mold in liquid form.
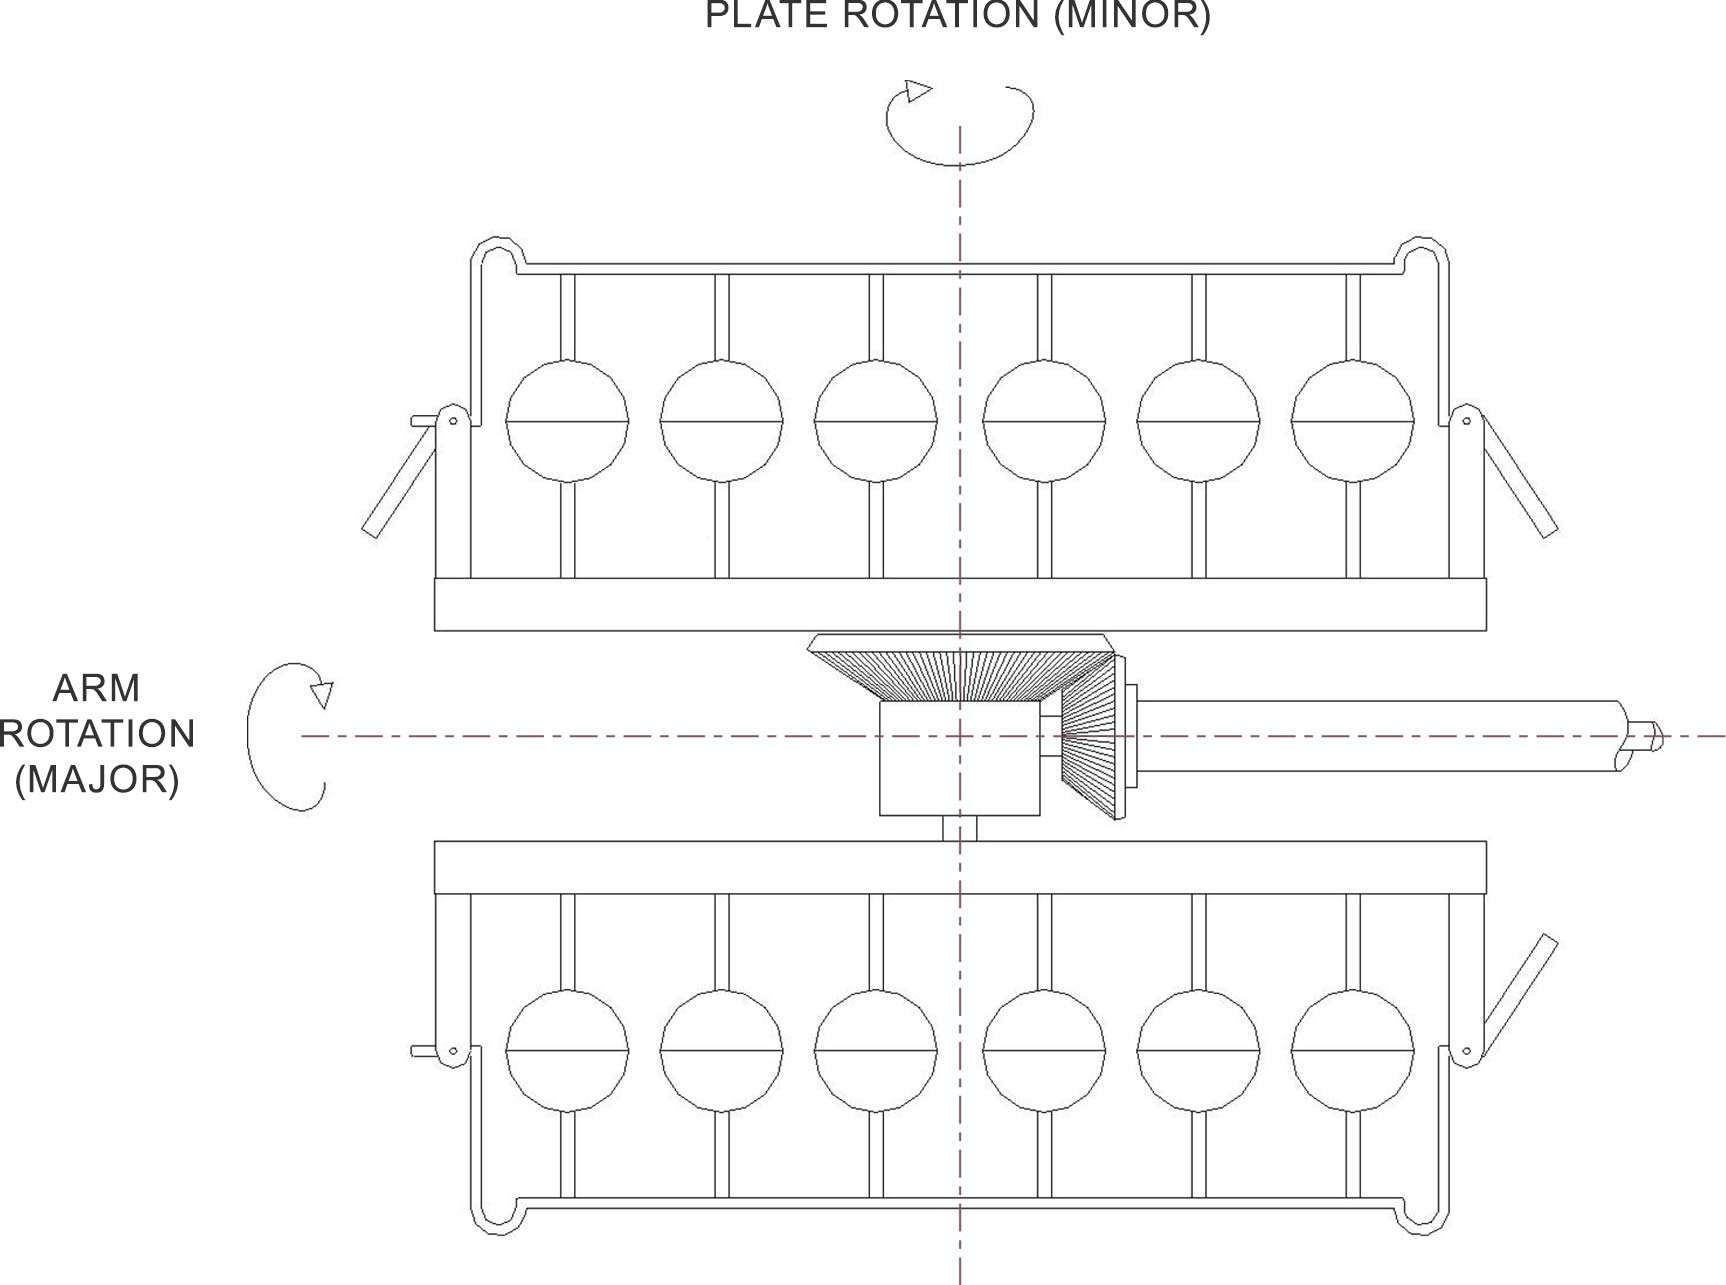
The mold is then moved into an oven and, as the mold is heated, it is rotated continuously about its vertical and horizontal axes; so-called “biaxial” motion (Fig 1). In modern machines, the ratio of these two motions (“major” axis to “minor” axis) is adjustable, by independently setting the rotation speeds. Rotation speed is usually low (less than 10 rpm) and, for most shapes, the major axis is rotated faster than the minor axis.

An alternative to biaxial is the so-called “rock and roll” motion (Fig 2), which is useful for long, narrow items. There is slow rotation in one direction and the mold is rocked in the other direction; the extent of this can be up to 50° from the horizontal.
A periodic reverse rotation can also be applied, which is useful in filling small intricacies and hidden areas of the mold.
The purpose of the continuous rotation is to bring all inside surfaces of the mold cavity into contact with the pool of plastic material. As the temperature of the mold increases, plastic material starts to become tacky and stick to the mold surface. This process continues until all the original material shot has coated the mould wall, usually in an even layer.
As the temperature of the mold and material continues to increase, the melting point of the plastic is reached and a change of state (from solid to liquid) occurs. This helps to densify the material, into a uniform layer of melt. At this stage, just after the powder shot has been used up, the melt will contain a multitude of small bubbles, created by air originally trapped between the interstices of powder particles. A further heating of the melt accelerates the dissolution of the gases in air into the polymer matrix and the bubbles disappear. At this point, the material has been properly processed and heating should be stopped. Excessive heating above this point may cause the plastic material to degrade and lose its physical properties.

Fig 3 shows a schematic of the densification process.
Material grades for rotomoulding are designed to provide a “processing window”: a range of processing conditions where a correctly processed part can be made. The formulation of polyethylene, the most common rotomoulding material, can be manipulated to provide a relatively wide processing window. Some alternative rotomolding polymers have significantly narrower processing windows and are therefore more challenging to mold satisfactorily.
In the next step of the rotomolding process the mold, which is still rotating, is moved out of the oven and cooled. Air is blown over the outside of the mold and, in some circumstances, heat transfer can be accelerated by the application of water spray. The temperature inside the mold drops progressively until it reaches the crystallization temperature of the polymer; at this point there is another change of state, from liquid to solid.
In many polymers, including polyethylene, this change of state is accompanied by a small degree of dimensional shrinkage. For polyethylene, this is usually in the range 1-4% and it can vary due to a number of related factors. Shrinkage needs to be accounted for in the design of the mold, because the finished part will be marginally smaller than the mold cavity from whence it came. In cases where different areas of a part shrink at different rates, the part shape may become distorted from its original design; this is commonly referred to as warpage.
Shrinkage and warpage are potential limitations to the achievement of close dimensional tolerances. They need to be accounted for in design and an experienced rotomolder has techniques to limit the deleterious effects of these phenomena.
Finally, the machine indexes the mold to the servicing station of the machine, where the mold is opened and the part is removed. It is good practice for this to be done while the part is still quite hot. If shrinkage and warpage considerations are relevant, the part can be inserted into a cooling fixture, where critical dimensions can be held to closer tolerances.

Fig 4 illustrates the variation of temperature across a typical rotomolding cycle. The Inner Air Temperature (IAT, the temperature of the air inside the mold) can conveniently be measured and used as a process control variable.
Once unloading has been completed, the mold is refilled with a new charge of material and the whole process is repeated.